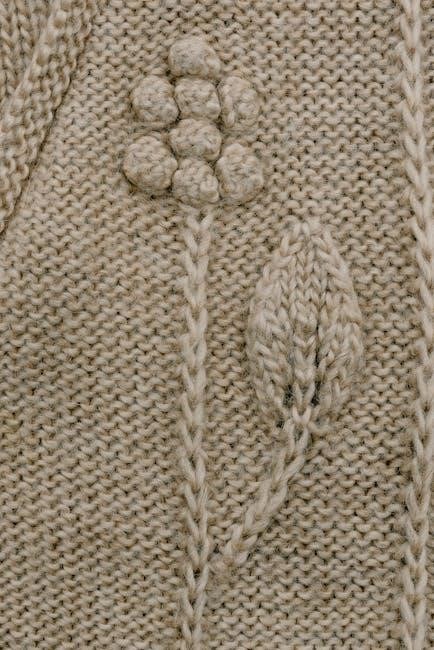
The cluster stitch is a versatile and popular crochet technique that creates a dense‚ textured fabric. It involves working multiple stitches together to form a single cluster‚ offering a reversible design perfect for blankets‚ scarves‚ and home decor items. This stitch is ideal for crocheters looking to add visual interest and depth to their projects.
What is the Cluster Stitch?
The cluster stitch is a crochet technique where multiple incomplete stitches are worked together to create a single‚ dense stitch. It typically involves grouping double crochet stitches (or other crochet stitches) into clusters‚ creating a textured‚ reversible fabric. This stitch is ideal for projects requiring a solid‚ thick material‚ such as blankets or baby items. The cluster stitch is versatile and can be adapted to various patterns‚ making it a popular choice for crocheters seeking a unique‚ visually appealing design.
Why Use the Cluster Stitch?
The cluster stitch is a favorite among crocheters due to its unique texture and versatility. It creates a dense‚ thick fabric‚ making it perfect for projects like blankets‚ scarves‚ and home decor items where warmth and durability are key. The stitch is reversible‚ adding aesthetic value to both sides of the work. Additionally‚ it’s relatively easy to learn‚ making it accessible to crocheters of all skill levels. Its ability to add visual interest without being overly complex makes the cluster stitch a go-to for many crochet enthusiasts.
Popular Projects for the Cluster Stitch
The cluster stitch is ideal for creating cozy blankets‚ scarves‚ and baby items like booties and hats. Its dense texture makes it perfect for dishcloths and home decor projects like pillow covers. The stitch’s reversible nature is great for blankets and scarves‚ ensuring both sides look appealing. Many crocheters also use it for granny-style squares and afghans‚ adding a classic touch. Its versatility and visual appeal make it a favorite for both functional and decorative items‚ providing endless possibilities for creative expression.
Materials and Tools Needed
To crochet the cluster stitch‚ you’ll need medium-weight yarn‚ a corresponding crochet hook‚ and basic tools like scissors and a tapestry needle for weaving ends. Stitch markers can help keep track of your pattern‚ ensuring accuracy and ease as you work through your project.
Choosing the Right Yarn
Selecting the right yarn for the cluster stitch is essential to achieve the desired texture and drape. Medium-weight yarns‚ such as acrylic or blends‚ work well due to their durability and stitch definition. Consider the fiber content based on your project’s purpose—acrylic for affordability‚ cotton for breathability‚ or wool for warmth. Choose a yarn with good stitch visibility to emphasize the cluster pattern. Always check the recommended hook size on the yarn label to ensure proper tension and fabric consistency.
Selecting the Appropriate Crochet Hook
Selecting the right crochet hook is crucial for achieving the perfect cluster stitch. The hook size directly impacts the texture and drape of your project. Use the hook size recommended on the yarn label as a starting point‚ but adjust based on your crochet style. If you crochet tightly‚ consider a larger hook; if loosely‚ opt for a smaller one. Aluminum or steel hooks are ideal for most yarns‚ while wood or bamboo hooks provide a warmer feel. Always test with a swatch to ensure the fabric isn’t too tight or loose‚ ensuring your cluster stitch pattern lies flat and even.
Other Essential Tools
Besides yarn and a hook‚ several tools are essential for mastering the cluster stitch. A tapestry needle is crucial for weaving in ends neatly. Scissors are needed to cut the yarn as you work. Stitch markers help keep track of your place‚ especially when working complex patterns. A measuring tape or ruler ensures your project dimensions are accurate. A yarn needle can also be useful for sewing seams if your project requires it. These tools will help you stay organized and maintain precision while crocheting the cluster stitch.
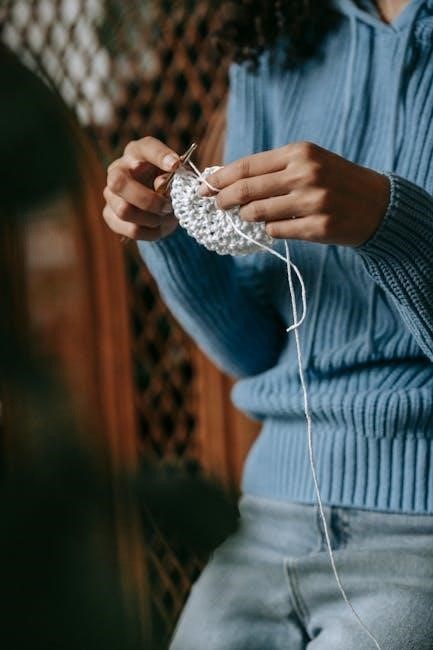
Step-by-Step Instructions for the Cluster Stitch
The cluster stitch is a versatile crochet technique that creates a textured fabric by working multiple stitches into one. Perfect for blankets‚ scarves‚ and more‚ it’s easy to learn and adds depth to any project.
Foundation Chain Setup
To begin the cluster stitch‚ start by creating a foundation chain that matches your desired project size. Chain in multiples of 2 or 3‚ depending on the pattern. For example‚ if your pattern calls for a cluster stitch blanket‚ chain an even number to ensure proper stitch alignment. Once your chain is complete‚ mark the end with a stitch marker to keep track. This setup ensures a balanced and even starting point for your cluster stitch project‚ making it easier to work the pattern seamlessly.
Working the First Row
After setting up your foundation chain‚ insert your hook into the second chain from your hook. Crochet a double stitch‚ then continue working double stitches across the row. Maintain a consistent tension to ensure even stitches. At the end of the row‚ turn your work and prepare for the next step in creating the cluster stitch pattern. This initial row sets the stage for building the clusters‚ so accuracy is key to achieving the desired texture and alignment in your project.
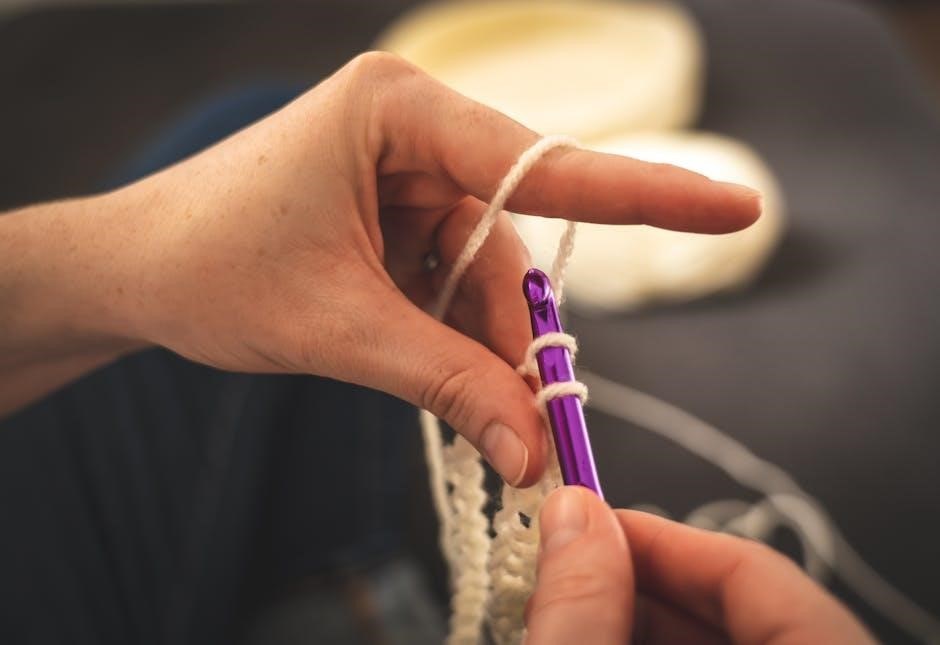
Creating the Cluster Stitch Pattern
To create the cluster stitch‚ yarn over and insert your hook into the next stitch. Yarn over again and pull up a loop‚ leaving multiple loops on the hook. Continue this process‚ working multiple incomplete stitches into one cluster. Once all loops for the cluster are on the hook‚ yarn over and pull through to complete the stitch. Repeat this process across the row‚ maintaining consistent tension to ensure a uniform texture. This step-by-step method builds the dense‚ reversible fabric characteristic of the cluster stitch pattern‚ enhancing your project’s visual appeal and durability.
Changing Colors in the Cluster Stitch
To change colors in the cluster stitch‚ complete the last loop of the current color before starting the new color. When working in rows‚ change colors at the end of a row by joining the new color in the first stitch of the next row. For rounds‚ join the new color at the beginning of the next round. Ensure the color change aligns with the cluster pattern to maintain consistency. This technique allows for vibrant‚ multi-colored designs while preserving the stitch’s texture and visual appeal.
Working the Cluster Stitch in the Round
Start with a magic ring or join chains to form a circle. Work clusters evenly around‚ joining each round with a slip stitch to maintain a seamless pattern.
Starting with a Magic Ring
To begin crocheting in the round‚ create a magic ring by looping the yarn and securing it with a stitch. This method allows for a tight‚ clean join without leaving a gap. Insert your hook into the ring and crochet the required number of stitches‚ typically single crochets‚ to form the foundation. Once complete‚ pull the yarn tail to tighten the ring and join with a slip stitch to start your first round of clusters. This technique is ideal for projects like amigurumi toys or coasters.
Creating a Circular Pattern
Starting with a magic ring‚ crochet clusters evenly around the circle to form a seamless pattern. Work the desired number of clusters‚ ensuring each is spaced consistently. For example‚ crochet 3 double crochet clusters around the ring and join with a slip stitch. Continue crocheting in rounds‚ maintaining the cluster pattern. Count your stitches to ensure symmetry and use stitch markers if needed. This method is perfect for creating rounded projects like granny squares‚ coasters‚ or amigurumi toys‚ resulting in a neat‚ professional finish.
Advanced Variations of the Cluster Stitch
Explore the Granny Cluster Stitch for a vintage look or the 3 Double Crochet Cluster Stitch for a modern twist. These variations add unique texture and style to projects‚ offering crocheters creative ways to enhance their designs while maintaining the cluster stitch’s signature appeal. Both techniques build on the basic cluster stitch‚ allowing for endless customization and artistic expression in crochet work.
Granny Cluster Stitch
The Granny Cluster Stitch is a charming variation that combines the classic cluster technique with the timeless appeal of the granny square. It involves working double crochet clusters separated by chain spaces‚ creating a vintage-inspired texture. This stitch is perfect for blankets‚ pillow covers‚ and other home decor items. To work the Granny Cluster Stitch‚ crochet a double crochet cluster‚ chain one‚ and skip a stitch‚ repeating across the row. Its reversible design and versatility make it a favorite for crocheters seeking a traditional yet modern look. Try it in vibrant colors for a bold‚ eye-catching effect.
3 Double Crochet Cluster Stitch
The 3 Double Crochet Cluster Stitch is a variation that involves working three double crochet stitches together to create a single cluster. It produces a dense‚ textured fabric with a subtle‚ visually appealing pattern. To work this stitch‚ yarn over‚ insert the hook into the stitch‚ yarn over‚ and pull up a loop. Repeat this process two more times in the same stitch‚ then yarn over and pull through all loops on the hook. This stitch is ideal for projects like blankets and scarves‚ offering a reversible design. Maintain even tension for a polished finish.
Troubleshooting Common Mistakes
When working the cluster stitch‚ common mistakes include uneven tension‚ misalignment of clusters‚ and forgetting to complete all loops. Ensure consistent stitch size by maintaining even tension. If clusters appear misaligned‚ check that you’re working in the correct stitch or space. Forgetting to pull through all loops can leave extra stitches on the hook‚ causing gaps. Count your stitches regularly and verify that each cluster is complete. Adjusting these issues early prevents needing to frogging your work later‚ ensuring a smooth and polished finish.
Project Ideas Using the Cluster Stitch
The cluster stitch is a versatile crochet technique that can be used for a variety of projects. It works beautifully for baby blankets‚ dishcloths‚ scarves‚ and granny square variations. The dense fabric created by the cluster stitch makes it ideal for home decor items like pillow covers and coasters. Additionally‚ it’s perfect for creating reversible designs‚ such as afghans or shawls. You can also use the cluster stitch to make amigurumi toys or add decorative borders to garments. Its textured appearance adds a unique touch to any crochet project‚ making it a great stitch for both beginners and experienced crocheters.
Video Tutorial for Visual Learners
For those who prefer visual guidance‚ video tutorials are an excellent way to master the cluster stitch. Many tutorials demonstrate step-by-step instructions‚ including how to work the stitch‚ change colors‚ and complete projects. Left-handed versions are also available‚ ensuring all crocheters can follow along. These videos often include close-ups of the stitch technique‚ making it easier to understand the process. Watching a tutorial can help clarify any confusion and provide a clear visual understanding of how to create the cluster stitch pattern effectively.
Congratulations! You’ve now mastered the cluster stitch‚ a versatile technique that enhances any crochet project. This stitch is perfect for creating textured‚ visually appealing designs‚ from blankets to home decor. Experiment with variations like the granny cluster or 3 double crochet cluster for unique looks. Practice makes perfect‚ so start a new project today to apply your skills. Share your creations and continue exploring crochet patterns to expand your craft. Happy crocheting and enjoy the satisfaction of creating something beautiful with the cluster stitch!
Related Posts

breg walking boot instructions
Breg walking boots offer superior support and immobilization during foot…

babyletto lolly crib instructions
The Babyletto Lolly Crib is a 3-in-1 convertible crib known…